Get WinDock

SETUP & EVERYDAY USE

From download
to your first tap.

A step-by-step guide to installing WinDock, connecting your phone, and making the dock yours. Start here, even if you’ve never used it before.

Let’s get set up Already installed? Get connection help ↗

01 / INSTALL BOTH APPS

One on your PC.
One on your phone.

The PC app runs your dock. The Android app is your remote. You need both for the Android experience; no WinDock account or subscription is required.

Before you start: a Windows 10/11 x64 PC, or a supported Hyprland Linux x86-64 computer; an Android 7.0+ phone or tablet; and shared Wi-Fi or a USB data cable. iPhone and macOS apps are not available yet.

ON YOUR WINDOWS PC

Install the Windows companion

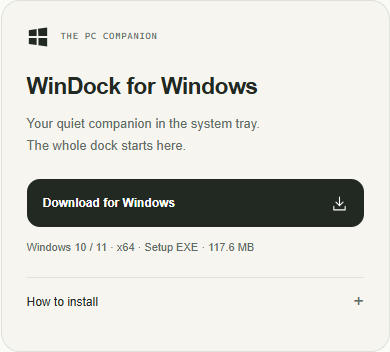
  1. On the PC, open Get WinDock and choose Download for Windows. Save WinDockSetup.exe.
  2. Open the downloaded file from your browser’s downloads or the PC’s Downloads folder. If you already use WinDock, choose Quit WinDock from its tray menu before updating.
  3. Follow the installer. A desktop shortcut and Start WinDock when I sign in to Windows are optional. Finish, then open WinDock from the Start menu if it hasn’t opened already.
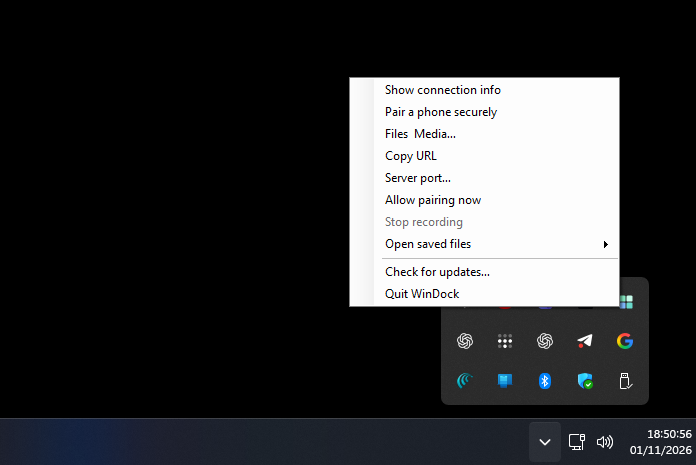
  4. Look beside the Windows clock. Click the ↑ hidden-icons arrow if needed, then right-click the WinDock icon. Choose Show connection info. Keep WinDock running while you use the phone.
  5. If Windows asks for network access, allow WinDock on your trusted private network. You do not need to turn off the firewall.
The Windows download card on the WinDock website, with its download button highlighted.
1 · Choose the Windows download on your PC. Screenshot of the public download page; version and file size can change. Go to downloads ↗Open full-size screenshot ↗

The installer includes its runtime. You don’t need Node.js, a terminal, or a startup script. Public installers are unsigned: use the official download links and their checksums if Windows asks you to verify the file. Don’t disable system protection.

Where is WinDock in the Windows tray?
Windows hidden-icons panel and WinDock menu: Show connection info is first; Pair a phone securely is second in the 0.3.0.
1 Open hidden icons, then right-click WinDock. 2 Open connection info for the address and PIN. 3 In the 0.3.0, choose Pair a phone securely for the QR window. Older releases won’t show this option.Open full-size screenshot ↗

ON YOUR LINUX PC · ALTERNATIVE TO WINDOWS

Install on Linux / Omarchy

Linux support currently targets Hyprland on x86-64. Full GNOME and KDE support is not available. Choose the package that matches your system from Get WinDock.

Show Linux installation steps
  1. Download the Arch / Omarchy package or Debian / Ubuntu package on the Linux PC.
  2. Open a terminal in the download folder. For Arch / Omarchy, run:
    sudo pacman -U ./WinDock-linux-x64.pkg.tar.zst
    For Debian / Ubuntu with Hyprland, run:
    sudo apt install ./WinDock-linux-amd64.deb
  3. Open WinDock from your application menu. Its window shows the connection details. In the 0.3.0 it also shows a local pairing-page link; open that link on the same PC.
  4. In the updated 0.3.0, run windock network and choose Check connection if the phone cannot connect. See firewall setup below.
  5. Leave the host running. With a systemd user session it continues after you close the window. If it says it is running in the window, keep that window open.

To stop it, use the window’s S command or run windock stop. For an update, install the newer package in the same way and reopen WinDock. Linux requirements and source-build instructions ↗

ON YOUR ANDROID PHONE OR TABLET

Install the Android app

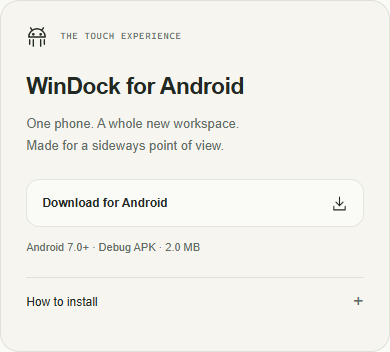
  1. Open this website on your phone. Go to Get WinDock, choose the Android download, and save the .apk file. An APK is an Android installation file.
  2. Tap the completed download. If you can’t find it, open your phone’s Files / My Files → Downloads and tap the WinDock APK.
  3. If Android says this source cannot install apps, open the offered Settings and allow installation from this browser or file manager. Return to the APK. Menu names vary on Samsung, Huawei, and other phones.
  4. Tap Install (or confirm the update), wait for it to finish, then tap Open. Later, open WinDock from your app list.
  5. After installation you can turn that source’s install permission off again. Keep the PC companion running, then follow the connection steps below.
The Android download card on the WinDock website, with its APK download button highlighted.
1 · Choose the Android download on your phone. The APK belongs on Android; the EXE belongs on Windows. Go to downloads ↗Open full-size screenshot ↗

Already installed? Install a matching-signed APK over the existing app to keep phone settings. Public 0.2.2 and later builds support this. If Android reports a conflicting package or signature, check the source and version before uninstalling: uninstalling clears phone preferences and pairing. Your PC’s dock stays on the PC.

02 / CONNECT & PAIR

Bring your devices
together.

First give them a network connection. Then pair your phone with the PC you want to control.

Option A · Wi-Fi

  1. Connect your phone to your home Wi-Fi. Connect the PC to the same router using Wi-Fi or Ethernet.
  2. Open WinDock on both devices. On the phone, choose Connect by Wi-Fi.
  3. Follow the PIN steps for public 0.2.6, or the QR steps for 0.3.0.

Use a trusted network. Guest Wi-Fi can block devices from communicating even when they share a network name.

Option B · USB tethering

  1. Connect the phone to the PC with a data-capable USB cable, then unlock the phone.
  2. In Android Settings, search for USB tethering and turn it on. It is often under Hotspot & tethering or Mobile hotspot.
  3. Return to WinDock. Choose Connect by USB → Find USB PC. Keep the PC host running.
  4. Pair using the appropriate steps below if this is your first connection.

USB debugging is not needed. Tethering may share mobile data; turn mobile data off if you don’t want the PC using it.

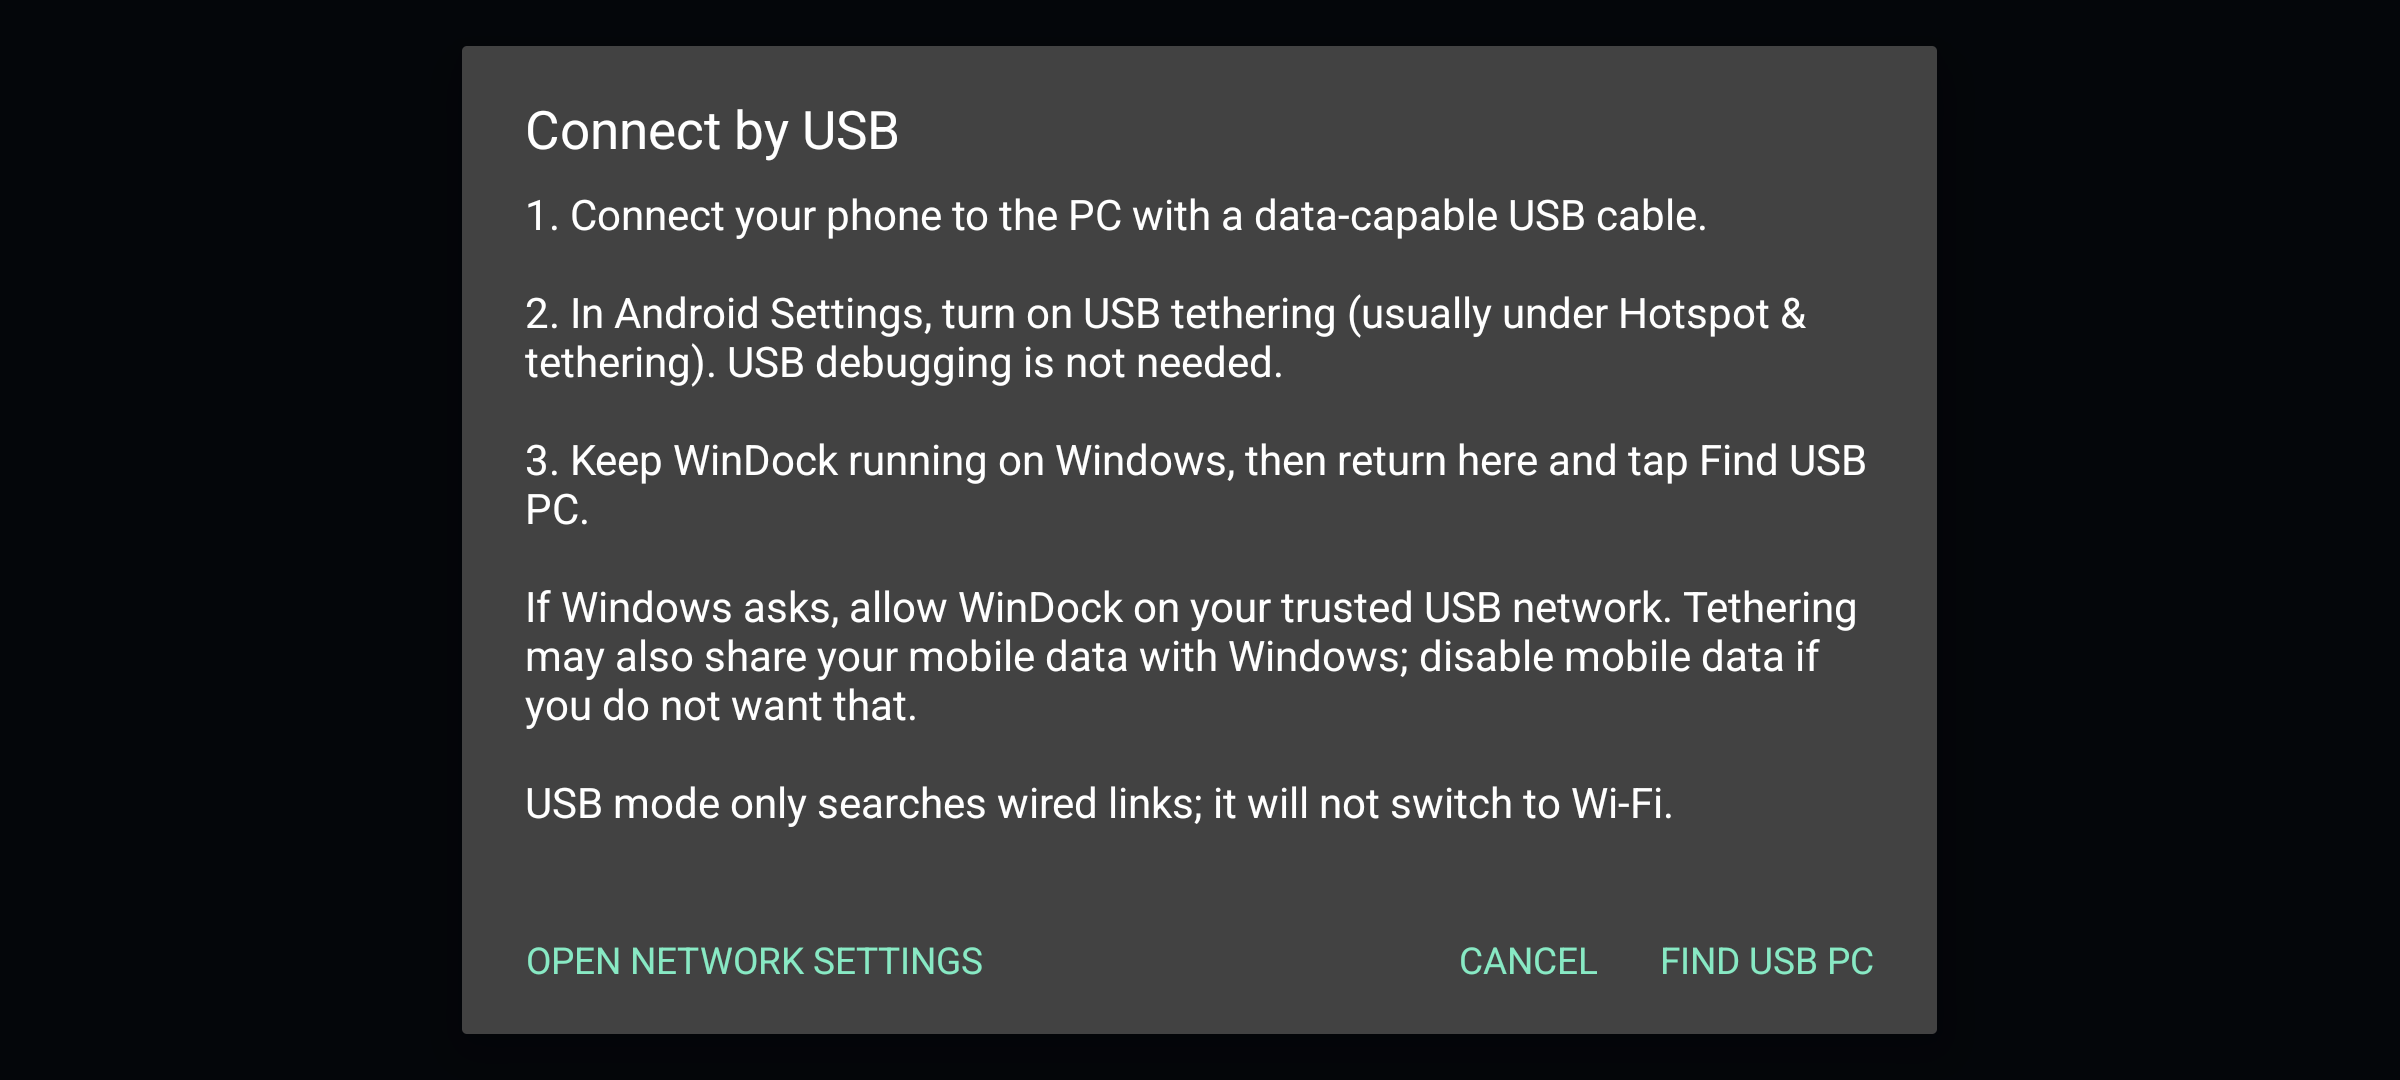
See the Android USB connection screen
WinDock’s Android USB instructions with Open network settings at the bottom left and Find USB PC at the bottom right.
1 Open settings and enable USB tethering. 2 Return here and tap Find USB PC. Android example; system settings and appearance vary by phone.Open full-size screenshot ↗

PUBLIC 0.2.6 · SIX-DIGIT PIN

Choose your PC and enter its PIN

  1. On Windows, right-click WinDock in the tray and choose Show connection info. On Linux, open WinDock from the application menu. Keep its address and pairing PIN visible.
  2. On the phone, choose your computer when it appears. Use Switch PC if you want another computer.
  3. If discovery finds nothing, enter the address and port shown on your PC in the phone’s address field, then tap Connect. Don’t copy an example address from a screenshot.
  4. Enter the six-digit PIN displayed by that host. The dock appears when pairing succeeds. Turn your phone sideways and tap an app tile to try it.

Public PIN connections use the local HTTP path. Keep them on trusted networks. Public 0.2.6 can ask for the PIN again after the PC host restarts; durable secure pairing is part of the newer preview.

0.3 PREVIEW · MATCHING UPDATED PC + ANDROID APPS

Scan once. Reconnect next time.

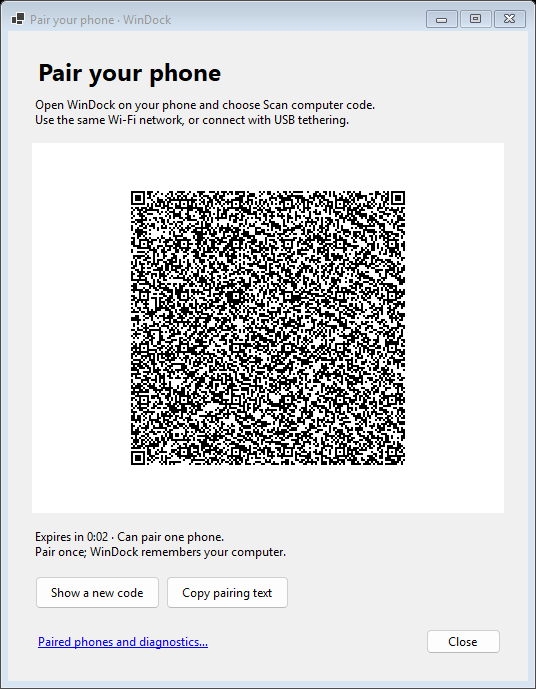
  1. On Windows, right-click the WinDock tray icon and choose Pair a phone securely. A WinDock window displays the QR code.
  2. On Linux, open the local pairing link shown by WinDock on that computer, then request a pairing code.
  3. On your phone, open WinDock and tap Scan computer code. Allow camera access to scan the code displayed on your own PC.
  4. Wait for the dock to open. The phone remembers this computer and uses an authenticated HTTPS connection.

The code expires after two minutes and works for one phone. Choose Show a new code if it expires. Don’t scan the example here.

No camera? On Windows use Copy pairing text, then Enter pairing text in Android. Transfer it privately; it grants pairing while valid.

This QR setup does not require installing a certificate in Android Settings or copying any .key file. Normal PC and phone restarts keep pairing; open WinDock again to reconnect. Resetting app data, revoking pairing, or session expiry can require pairing again.

WinDock’s native Windows pairing window. The QR is a synthetic test example that cannot connect to a computer. Refresh and pairing-text buttons are below it.
1 Scan the code on your own PC. 2 Refresh an expired code. 3 Copy pairing text as a camera-free alternative. Test screenshot · example QR cannot pair.Open full-size screenshot ↗

03 / YOUR FIRST FEW MINUTES

Make a little room
for your everyday.

Start with one app tile and a short message. The phone controls the PC you’re connected to.

Add and arrange your apps

  1. Swipe up on the dock and open Apps. Find an installed PC app and tap it to add a tile.
  2. Return to the dock and tap the tile to launch or focus that app on the PC.
  3. Hold a tile to arrange it. Drag it to a new position, or to a page edge to move it between pages. Swipe sideways to change pages.
  4. Use Appearance to choose four, six, or eight icons per page, your background, and other display preferences. More pages appear as you add tiles.

Removing a tile only removes its shortcut; it doesn’t uninstall the PC app.

Find your controls

Public 0.2.6: swipe up for the drawer, then choose Touch & sign, Controls, or Capture.

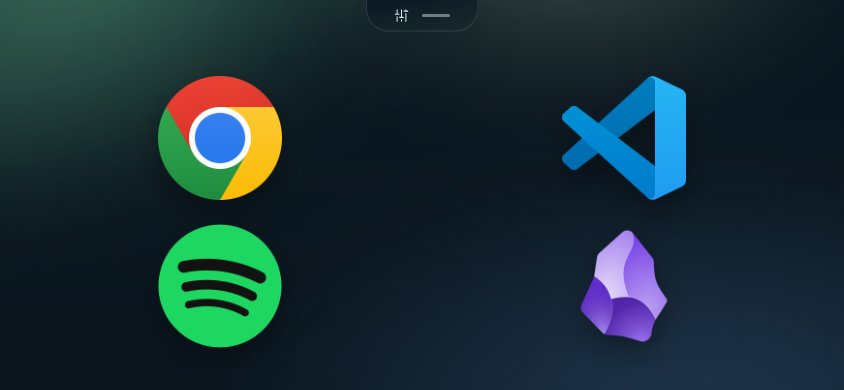
0.3.0: swipe down inside the dock, or tap the small island at the top, for sound, playback, and display controls. The shortcuts below open Touch & sign, Capture, Files & Media, and Power. Power actions still ask for confirmation. Swipe up for Apps, Appearance, Edit dock, and Updates. Edit dock lets you rearrange or remove tiles. Start the downward swipe inside WinDock, below Android’s screen edge. The Android app already fills the screen; browser users can find Fullscreen in Appearance.

The preview dock with Chrome, Visual Studio Code, Spotify and Obsidian example tiles; the controls island sits at the top center.
1 · Tap the top island for quick controls. 0.3.0 demo screenshot. You can also swipe down inside the dock; swipe up opens the apps drawer.Open full-size screenshot ↗

Touchpad, keyboard & voice typing

In 0.3.1, use PC keys to show or hide Esc, Tab and Delete on the left, with Home, End and arrows on the right. They dim and disable while your finger is on the touchpad.

Open Touch & sign. Move your finger on the touchpad to move the PC pointer. Focus a text field on your PC, then use the keyboard button on your phone if the keyboard hasn’t opened automatically.

Use your phone keyboard’s microphone for voice typing if that keyboard supports it. WinDock sends committed text to the focused PC field; Space or Enter can commit a word. Dictation availability depends on your keyboard, not a separate WinDock voice feature.

Clipboard & signatures

In Touch & sign → PC clipboard, choose recent text, review or edit it, then tap Paste to PC with a text field focused on the computer. Browsing the list sends nothing.

Windows history needs Windows + V enabled. Linux uses a running clipboard manager or the current clipboard. Signatures are handwritten images: save a PNG or paste into a PC app that accepts images.

Sound, playback & capture

Use the available controls for volume, media playback, and supported display brightness. Which controls appear depends on your computer and hardware.

On supported hosts, Capture saves PC screenshots or starts a screen recording. Use Stop to finish recording and the PC’s saved-files shortcut to find the result. Screen recording is video-only.

Switch PCs & rest the screen

Open Switch PC from the Android connection screen or dock drawer. Choose a running computer and pair if prompted. Each PC keeps its own dock.

For dimming and screen rest, use This phone on the connection screen or Appearance → This phone · screen & sleep. In the secure connection, unlock the phone and reopen WinDock to reconnect.

WINDOCK 0.3.0

Files, folders & website shortcuts

Send photos, videos, or documents to the PC
  1. Connect to your securely paired PC. Open Files & Media from quick controls and select files with Android’s picker.
  2. Or open Gallery / Files, select one or more items, then choose Share → WinDock.
  3. Review the selection and connected PC, then choose Send to PC. Keep WinDock open and the phone awake until it finishes. Use Cancel to stop.
  4. Find completed files in Downloads/WinDock on the PC, unless you changed the receiving folder. In Windows, use tray → Files & Media → Open folder. On Linux, open the receive dashboard with windock files.

Receiving must be enabled on the PC. Existing files are not silently overwritten; duplicates get a numbered name. After an interruption, check status and retry. Completed files stay; an incomplete file restarts rather than resuming partway.

Add an exact folder or a website to the dock

Folders (Windows): open Apps → Folders → Choose on PC, choose a folder in the dialog on the PC, then launch it from its tile. Removing the tile does not delete the folder.

Links (Windows and Linux): open Apps → Links, enter a full https:// or http:// address and an optional name, then add it. Its tile opens that page in the PC’s default browser. Internal browser addresses such as brave:// are not supported.

WINDOCK 0.3.0 · ON YOUR COMPUTER

PC found, but the secure connection fails?

Discovery and the secure connection use different ports. A PC can appear in the list while its firewall blocks pairing. A timeout can also come from guest Wi-Fi, a VPN or an unavailable PC.

  1. On Linux, run windock network. On Windows, open Pair a phone securely → Connection help and paired phones.
  2. Expand Phone finds this PC but cannot connect?, then select Check connection. Use the ports shown there; the secure port is usually 8621 but can change.
  3. Choose only the network shared with your phone. Review the suggested commands. Linux supports instructions for UFW and firewalld; unknown firewall setups need your administrator. On Windows, first allow WinDock’s bundled runtime on your trusted Private network. The optional PowerShell commands also require an administrator.
  4. Run only the rules you need. Secure phone access and discovery are listed separately from optional browser/older-client access. Your operating system requests administrator permission; WinDock never asks for your password.
  5. Show a fresh QR code and scan again. Keep your saved pairing and dock. If you switch to USB tethering, enable tethering first and check again: it may create another network and need a separate rule. On Windows, classify the tethered network as Private only if it is your own trusted phone.

These checks do not change your firewall and cannot prove a phone can reach the PC. Keep the firewall enabled; do not forward router ports. On a managed work or school computer, ask its administrator. Older versions without Check connection need a matching updated companion first.

04 / A LITTLE HELP

Not connected yet?
Start here.

I opened WinDock on Windows, but nothing appeared.

The companion lives in the system tray. Click the hidden-icons arrow beside the clock, right-click WinDock, and choose Show connection info. The secure connection also has Pair a phone securely. See the marked tray screenshot above.

My phone can’t find the PC.

Check that WinDock is running on the PC, the PC is awake, and both devices use the same trusted network. Avoid guest Wi-Fi or router client isolation. Allow WinDock through the firewall on that private network. For public PIN pairing, enter the PC’s displayed address and port manually. In the secure connection, pair using the PC’s current QR code; an address by itself does not establish trust. Never enter 127.0.0.1 from the PC’s local pairing-page link into the phone.

USB tethering is greyed out, or Find USB PC finds nothing.

Unlock the phone, reconnect it, and try a different USB port or data-capable cable. A charge-only cable cannot carry the connection. Turn USB tethering on in Android Settings before returning to WinDock. Keep the PC host running, then retry Find USB PC. To return to wireless, choose Connect by Wi-Fi.

How do I change the PC or enter another address?

In the updated secure connection, tap Connection at the top-left of the dock. Enter an address under Use another address, choose Saved & nearby PCs, or scan the new PC’s code. Automatic reconnection pauses while this page is open. Return to saved PC reconnects to your existing computer without removing its pairing or tiles. During a connection attempt, tap Change connection to stop waiting. Older versions use Switch PC → Enter address from the drawer, or Android Back after closing any open panels.

I don’t see Scan computer code or Pair a phone securely.

QR pairing needs the updated 0.3.0 on both devices. Public 0.2.6 uses the displayed address and PIN. Check Updates to see which versions you installed; don’t use preview instructions for older apps. Use the public PIN guide.

The QR code expired or my camera won’t scan it.

Choose Show a new code on the PC and scan it within two minutes from Android’s Scan computer code. Each code pairs only one phone. Allow camera access if you want to scan. Alternatively use Copy pairing text → Enter pairing text. The example QR in this guide is deliberately unusable.

I’m asked to pair again after a restart.

That can happen with public 0.2.6 because the host’s PIN sessions are reset when it restarts. The secure connection keeps pairing across ordinary restarts: start the PC companion, unlock your phone, and open WinDock. If app data was cleared, pairing revoked, or the session expired, pair again using your own PC’s fresh code. An unexpected certificate or identity warning should be checked on the PC; don’t bypass it or install a random certificate.

The APK won’t install or says “App not installed.”

Confirm the phone runs Android 7.0 or newer, has free storage, and downloaded the complete APK from the official source. Allow installation for the app opening the APK. A different signing key or an older version can prevent an in-place update. Check the version and source first; uninstalling clears phone settings and pairing. It does not delete your PC dock.

Typing pauses until I press Space or Enter.

Phone keyboards often compose a word before committing it. WinDock forwards committed text, so Space or Enter can send the current word. First focus a text field on the PC. Use your phone keyboard’s microphone for supported dictation; you don’t need a dedicated WinDock voice feature.

A file transfer stopped or the destination won’t accept files.

Keep WinDock in the foreground, check the connection and free PC storage, and confirm receiving is enabled in the PC’s Files & Media settings. Retry or check status before sending the same batch again. Use a compatible local destination such as NTFS on Windows or ext4 on Linux; FAT/exFAT and some network shares cannot safely finalize transfers. The current preview allows up to 50 files per batch, 8 GiB per file, and 32 GiB total; smaller batches are easier on a slow connection.

The interface is blank or slow on an older phone.

Install the latest compatible Android System WebView update from your device’s official update source, then reopen WinDock. On some older Android versions, Chrome supplies WebView, so update Chrome too. Try Appearance → Performance mode → On if Auto does not help. This reduces visual effects. Keep the app open during use.

Can I connect away from home or use a browser?

The public version can open the PC’s displayed browser address and pair by PIN on a trusted network. If you already use Tailscale on both devices, the public Android app can use the PC’s numeric Tailscale address manually; discovery remains local. WinDock doesn’t set up a VPN or relay. Don’t expose its ports directly to the internet. Secure preview pairing still requires the updated Android app; browser access uses the legacy path.

Brightness says “Control sent,” but the screen does not change.

Some monitors accept brightness commands while HDR or a picture mode prevents a visible change. Check Windows Settings → System → Display → HDR for the affected display. If HDR is on, you can temporarily turn it off and try again. WinDock never changes HDR for you. The updated preview shows an amber hint after a brightness command when Windows reports an active HDR display.

For an external monitor, also check DDC/CI in its own menu. For a built-in laptop panel, check the display driver. If it still fails, report the PC and display models, Windows and WinDock versions, HDR status, and the exact message.

How do I update without losing my dock?

Check Updates in WinDock. On Windows, quit the tray app before running the new installer, then reopen it. On Linux, install the new package and reopen WinDock. On Android, install the matching-signed newer APK over the existing app. Keep the PC’s saved app data: that is where the dock and secure identity live. Downloading an update alone doesn’t install it.